
Last updated November 18, 2026
 Hardwood
 Engineered hardwood
 Luxury vinyl plank
 Laminate
 Porcelain tile
 Carpet
 Shaw
 Mohawk
 COREtec
 Pergo
Free in-home measure and written estimate: Shaw, Mohawk, COREtec and Pergo lines compared on your own rooms, with carpet, tile, vinyl plank, laminate and hardwood laid out side by side
Get your free estimateSubfloors Explained: What Sits Under Your New Floor
You can spend good money on COREtec or Pergo and still end up with a floor that pops, clicks, and separates within a couple of years. That’s not a product failure. In most of the homes we see in North Las Vegas, it’s a subfloor failure. New flooring gets all the attention at the showroom, but the layer underneath is what decides whether the finished surface stays tight and flat or starts telegraphing every dip, crack, and moisture pocket in the slab. Most homeowners never think about it until something goes wrong.
This guide is about that hidden layer. We’ll cover why concrete slab is the near-universal base under North Las Vegas homes, what flatness and moisture actually mean for your install, and how old tile removal and surface prep change the job. By the end you’ll know what to ask before anyone sets a single plank.
Quick Answer
Your subfloor is the structural surface beneath the flooring you see: usually a concrete slab in North Las Vegas, and sometimes plywood or OSB over framing. It has to be flat and dry before new flooring goes down. Two numbers matter most: flatness, generally checked against a manufacturer’s tolerance like 3/16 inch over 10 feet, and slab moisture, which needs testing before anything is glued or floated over concrete. Get those wrong and even premium flooring can fail.
Styles & brands we work with
- Hardwood
- Engineered hardwood
- Luxury vinyl plank
- Laminate
- Porcelain tile
- Carpet
- Shaw
- Mohawk
- COREtec
- Pergo
Table of Contents
- Why Concrete Slab Dominates North Las Vegas Subfloors
- The Flatness Standard Most Flooring Requires
- Moisture Vapor: The Desert’s Hidden Problem
- Self-Leveling Compound: What It Is and When You Need It
- What Old Tile Removal Reveals About Your Subfloor
- The Moisture Barrier Question
- A Step-by-Step Look at Subfloor Prep
- Common Mistakes to Avoid
Why Concrete Slab Dominates North Las Vegas Subfloors
Walk into almost any single-family home in North Las Vegas and you’re standing on a concrete slab. That’s the norm for desert residential construction, and it shapes everything about how a flooring job gets done here. The slab is your subfloor, and unlike a wood-framed floor system, it doesn’t flex or breathe the same way. It’s also the layer that holds or releases moisture, accepts or rejects adhesive, and decides whether a floating floor sits quiet or rattles underfoot.
That matters because most of the country’s flooring advice is written for wood subfloors: plywood sheathing over joists, nailed down, with a little give. Slab is a different animal. It’s rigid. It’s cold. It can hold moisture deep inside and release it slowly over months. If you’re following a wood-subfloor guide on a concrete slab, you’re reading the wrong manual.
In North Las Vegas in particular, the slab usually sits directly on grade or close to it. There’s no basement to buffer groundwater movement, and no crawl space to vent under the floor. Whatever moisture is in the ground can migrate up through the slab and into the floor above. In a wet climate that’s an obvious problem. In a desert it’s a quiet one, and quiet problems are the ones that surprise homeowners.
If you’re unsure what’s under your existing floor, the first move is simple: pull back a floor vent or lift a transition strip and look. You’ll see either concrete or wood. A free in-home estimate is also the moment to have it checked properly, since the right flooring choice depends on the answer. That’s part of why we always start with a look at the actual subfloor, not just a square-footage quote.
Ready to talk through what’s under your floor? Call Floors North Las Vegas at (888) 393-9180 to book a free in-home measure.
The Flatness Standard Most Flooring Requires
Manufacturers set a flatness tolerance for their flooring, and it’s often stated around 3/16 inch over 10 feet, though the exact number depends on the product. That means if you stretch a straightedge across the slab, the gap underneath shouldn’t exceed that tolerance. It sounds tiny. In practice it’s the difference between a floor that locks tight and one that rocks.
Flatness matters most for floating floors: rigid-core luxury vinyl plank, laminate, and many engineered products that click together rather than glue down. Those floors need a flat plane to distribute load evenly. On a slab with a dip or a hump, the planks bridge the gap and flex every time you walk on them. Over time the joints work loose. That’s how you end up with clicking seams and lifting edges.
Here’s how flatness gets checked, in general terms:
- A long straightedge is laid across the slab in multiple directions, including diagonals.
- The gap under the straightedge is measured at its widest point.
- Any high spots get ground down or knocked off; low spots get filled.
- The manufacturer’s written tolerance is checked against the measurements before any flooring goes down.
That sounds like a lot of checking for a floor you can’t see. But it’s the work that makes the finished floor look right. In our experience, slab-on-grade homes in North Las Vegas often have minor high spots from the original pour, and dips where settling has occurred. Neither is unusual. Both have to be handled before installation.
If you’re replacing flooring across a whole home and flooring different rooms, that flatness check happens once, before the first material is ordered. It saves rework later.
Moisture Vapor: The Desert’s Hidden Problem
Here’s the counterintuitive part: even in the desert, concrete slabs off-gas moisture. A concrete slab poured on grade sits in contact with the ground, and moisture from the soil moves into and through the concrete over time. As the slab releases that vapor, it can affect any flooring sitting on top of it. Adhesive can break down. Floating floors can swell or buckle at the seams. Glue-down plank can lift.
In North Las Vegas, you don’t get the obvious wet-season problem. The risk sits quietly under the slab. Homes built over certain soil conditions, or where exterior grading directs water toward the foundation, can have active vapor movement that’s easy to miss. Without a moisture test, nobody knows what’s happening in the slab.
Moisture testing is usually straightforward and happens at the estimate or pre-install visit. It’s not diagnostic for the homeowner. It’s information the installer needs to choose the right system: a moisture-rated adhesive, a vapor barrier, or a different product altogether. Ask about it. A lot of installation problems trace back to skipping that test.
Water-resistant flooring like COREtec or LifeProof handles surface spills well. It doesn’t handle moisture coming up through the slab. Those are different problems and only the right underlayment or barrier addresses the vapor movement.
Self-Leveling Compound: What It Is and When You Need It
Self-leveling compound is a pourable, cement-based underlayment that fills low spots and corrects a slab’s flatness. You mix it, pour it, and it flows across the floor to a level finish. Once it cures, the subfloor is flat enough for the new flooring to go down correctly.
It gets added when the existing slab doesn’t meet the manufacturer’s flatness tolerance, or when tile removal has left the surface uneven. It also helps stabilize porous or slightly friable concrete before a glue-down install.
Not every job needs it. Plenty of North Las Vegas homes have a slab that’s flat enough to accept new flooring without leveling. The only way to know is to check. But when it’s needed, skipping it to save on the budget is the shortcut that voids product warranties and forces a redo.
Think of self-leveling compound less as an upsell and more as cheap insurance. A flat, prepared slab lets your flooring perform the way the manufacturer wrote the tolerance for. If you’re comparing quotes and one has leveling while another doesn’t, ask the second quote what happens if the slab isn’t flat. The answer tells you something.
Adding this step also changes the timeline. A poured leveler needs to cure before the flooring goes down, so the install day is booked after prep, not the same visit. That’s normal, and it’s the schedule set at the estimate, not something you can rush.
What Old Tile Removal Reveals About Your Subfloor
Tile is everywhere in North Las Vegas homes. A lot of resale homes still have original tile from decades past, and pulling it out is where subfloor surprises show up. Removal isn’t just physical labor. It’s a chance to see what’s actually under the floor you’ve been living on.
What a tile tear-out typically reveals:
- Adhesive residue. Old thin-set or mastic leaves a bumpy layer that stops new flooring from sitting flat. It has to be ground off or skim-coated before anything else goes down.
- Height variations. Original tile often sits over a mud bed or leveling layer, and removal exposes the transition between that layer and the surrounding slab. Those height differences are real and have to be planed or filled.
- Surface porosity. Once the tile comes up, the concrete is often porous and dusty. It needs cleaning and priming before adhesive or leveler will bond.
- Hidden cracks or patches. Older tile sometimes covers patched cracks or cold seams in the slab. Seeing them early lets you plan for them instead of finding out after installation.
This is one reason installing tile flooring installation is more involved than it looks. The old surface has to be removed cleanly before the new floor can be trusted. If the room is going to carpet instead, the same rule applies: prep comes first. Either way, the subfloor condition after removal shapes the entire job.
The Moisture Barrier Question
A moisture barrier is a thin layer that goes between the slab and the new flooring. It blocks vapor from coming up through the concrete. Whether you need one depends on the product and what moisture testing shows. Some flooring systems require one under their warranty. Others are built with an attached underlayment and don’t need a separate barrier.
Where it gets tricky is the “optional but smart” middle ground. A floating floor installed over an active slab with no barrier is a known risk. Vapor travels up, gets trapped, and the floor absorbs it. What happens next depends on the product. LVP and laminate with a rigid core handle a lot, but not standing moisture. Carpet backed with padding can trap odor. Glue-down products with an incompatible adhesive can lift.
The safe rule is: check the moisture, follow the product’s instructions on barriers, and don’t skip the barrier when a test says you need one. The check is cheap. The redo isn’t.
For rooms that are moisture-prone, like kitchens, bathrooms, and laundry rooms, the right product combined with a barrier is where a real installation earns its keep. This is the same reasoning behind choosing COREtec or LifeProof for a bathroom or pet-owner household where a well-sealed core matters. Those are product decisions. Getting the underlayment right is what lets the product do its job.
A Step-by-Step Look at Subfloor Prep
Subfloor prep in a North Las Vegas home usually follows a set sequence. It’s not glamorous work, but it’s the part that separates a floor still intact years from now from one that needs a redo. Here’s what happens, generally, from start to flooring install.
- Assess the existing floor. Identify the current flooring, its thickness, and how it’s bonded. Look for any soft spots or hollow areas.
- Remove the old surface. Tile, carpet, or old vinyl comes up. That exposes the actual slab.
- Clean and prep the slab. Grind off adhesive residue, sweep, and inspect for cracks and patches.
- Test moisture. A moisture test tells you whether the slab is dry enough to accept the chosen flooring, or whether a barrier is needed.
- Check flatness. Straightedge checks reveal any high and low spots. The manufacturer’s tolerance is the benchmark.
- Level as needed. Poured compound or grinding corrects the slab. This step sometimes adds a full day before install. Cure time depends on the product, the house, and the written estimate.
- Install the underlayment or barrier. Product instructions set which type goes down and how it overlaps or seals.
- Install the flooring. Now the surface layer goes on a prepared base.
Not every job needs every step. A carpet install over a sound slab skips the leveling and barrier steps. A tile job adds some of its own prep. But the sequence as a whole is why flooring projects take a booked day (or days) rather than a quick afternoon. We schedule the work for North Las Vegas homes with an in-home measure first, so the prep plan is set before the install day.
If you’re planning to redo carpet, tile, and a bathroom floor in the same home, the good news is the prep and flatness checks happen once. From carpet installation to tile to hardwood, the same specialist handles all three, and that means less coordination between separate contractors. It also means one crew understands how each room’s subfloor interacts with the next.
How Does Subfloor Condition Affect Hardwood Refinishing?
Hardwood is a different case. In North Las Vegas, hardwood is typically glued or floated over a prepared slab, and how well that floor was installed affects whether it can be refinished later. Refinishing means sanding down the surface to remove wear and applying a fresh finish. It all depends on the thickness of the wood and its condition, and both get checked at the estimate visit. A floor with enough wear layer left can often be restored rather than replaced, which is cheaper and keeps the existing material out of the landfill.
If you have an older hardwood floor that’s looking worn, and the subfloor under it is sound, refinishing is worth asking about before you price a replacement. Mannington and Armstrong both make resilient and wood products we work with, and Karndean rounds out the premium end of the luxury vinyl lineup. In any case, the underlying slab has to be dry and flat for any of it to perform. There’s no finish or plank that fixes a bad subfloor.
See the difference
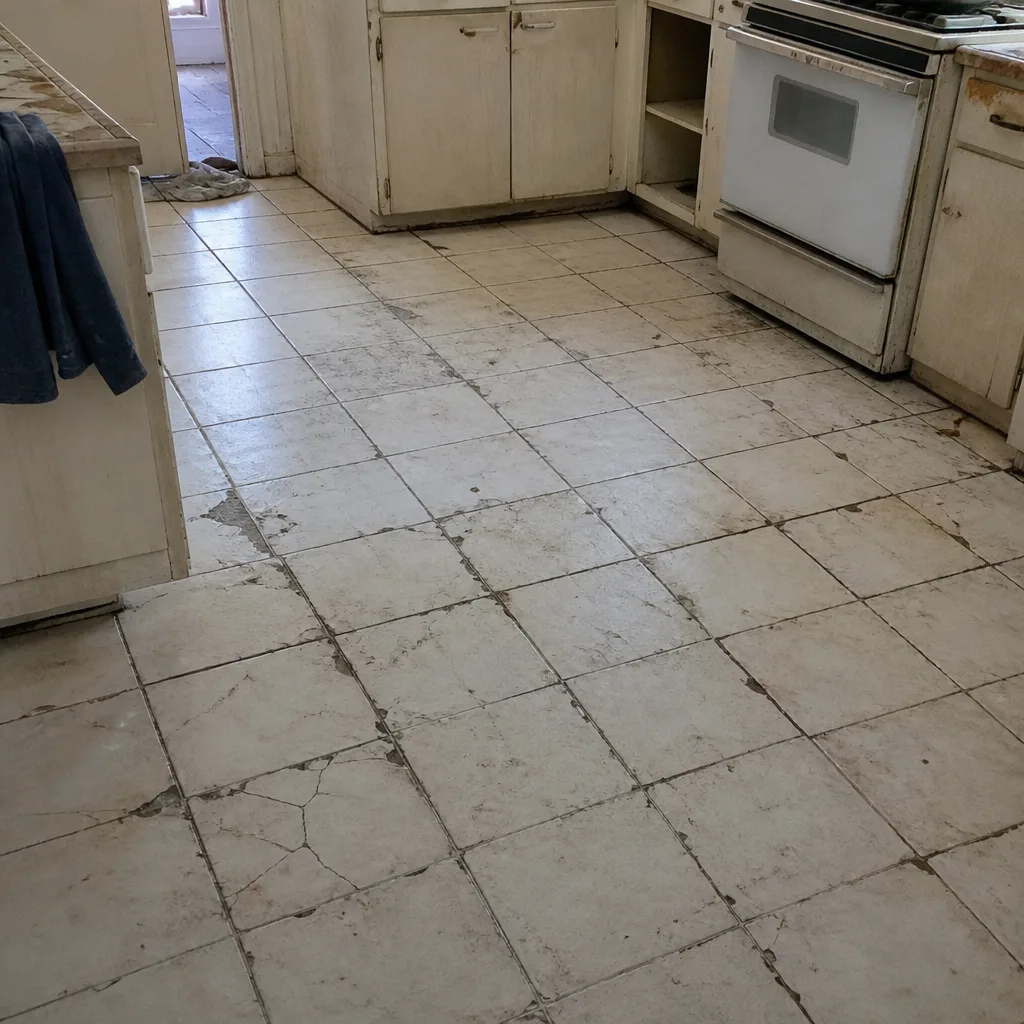 Before
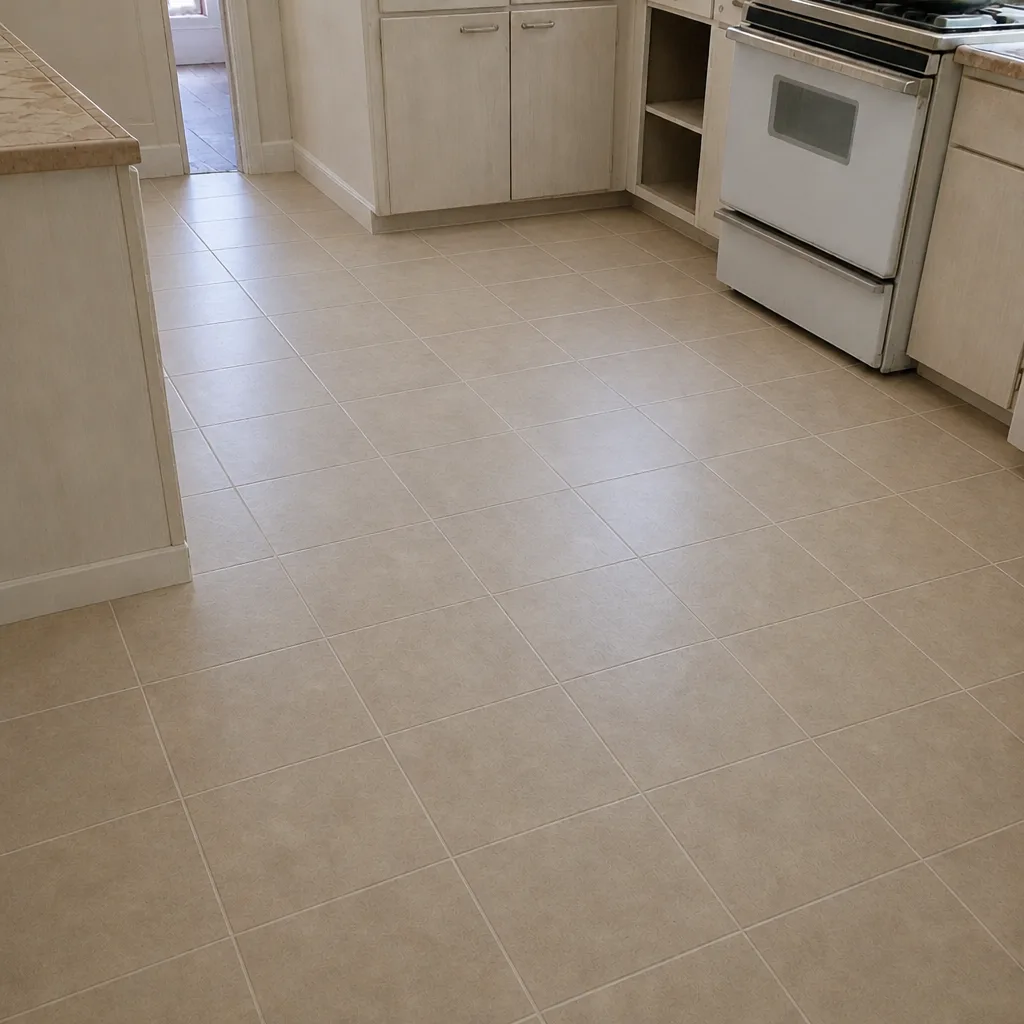 After
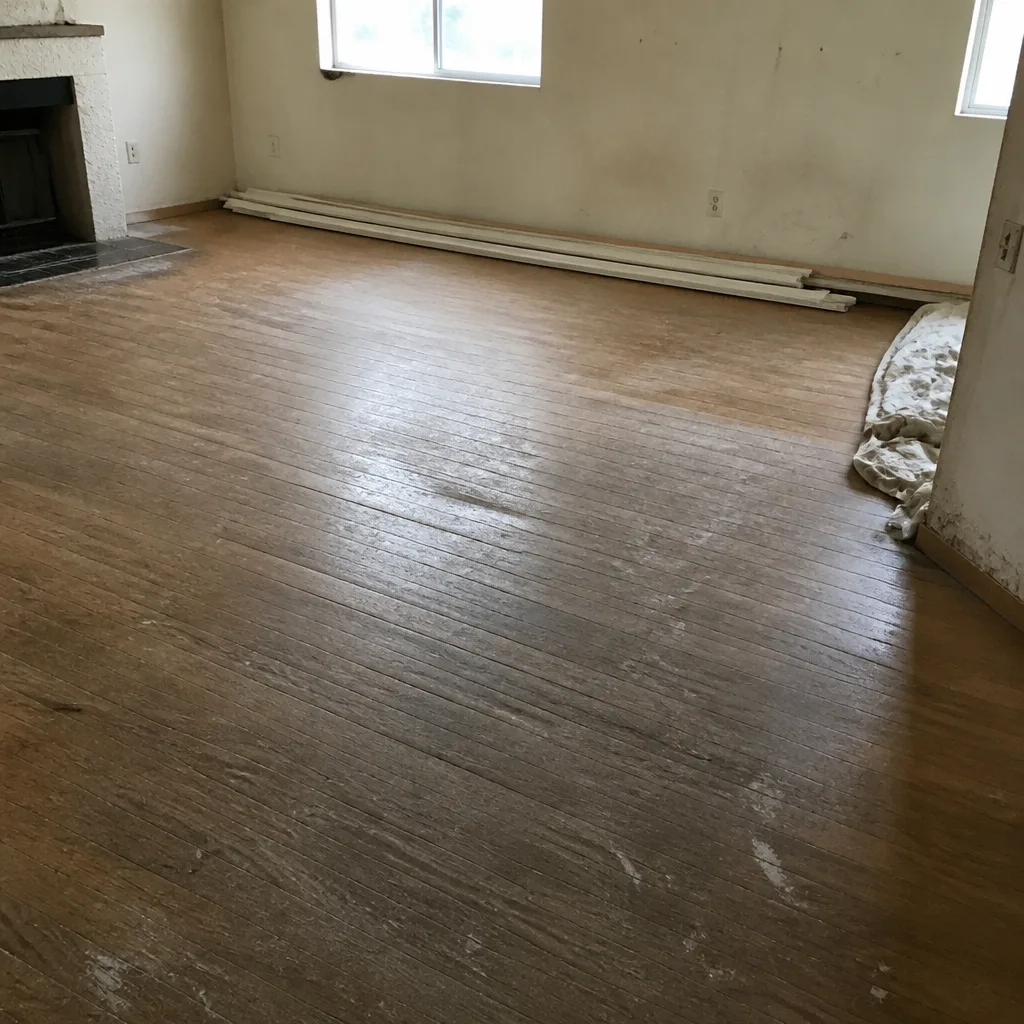 Before
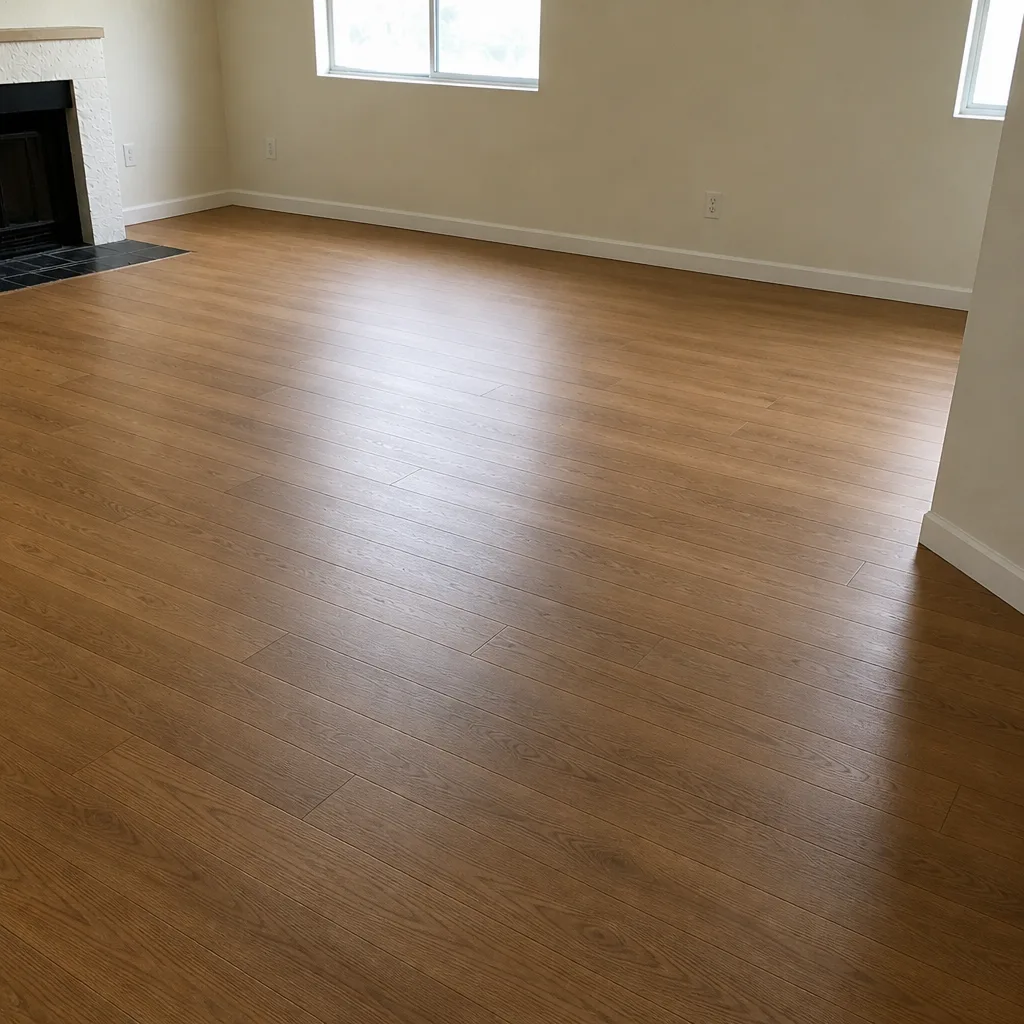 After
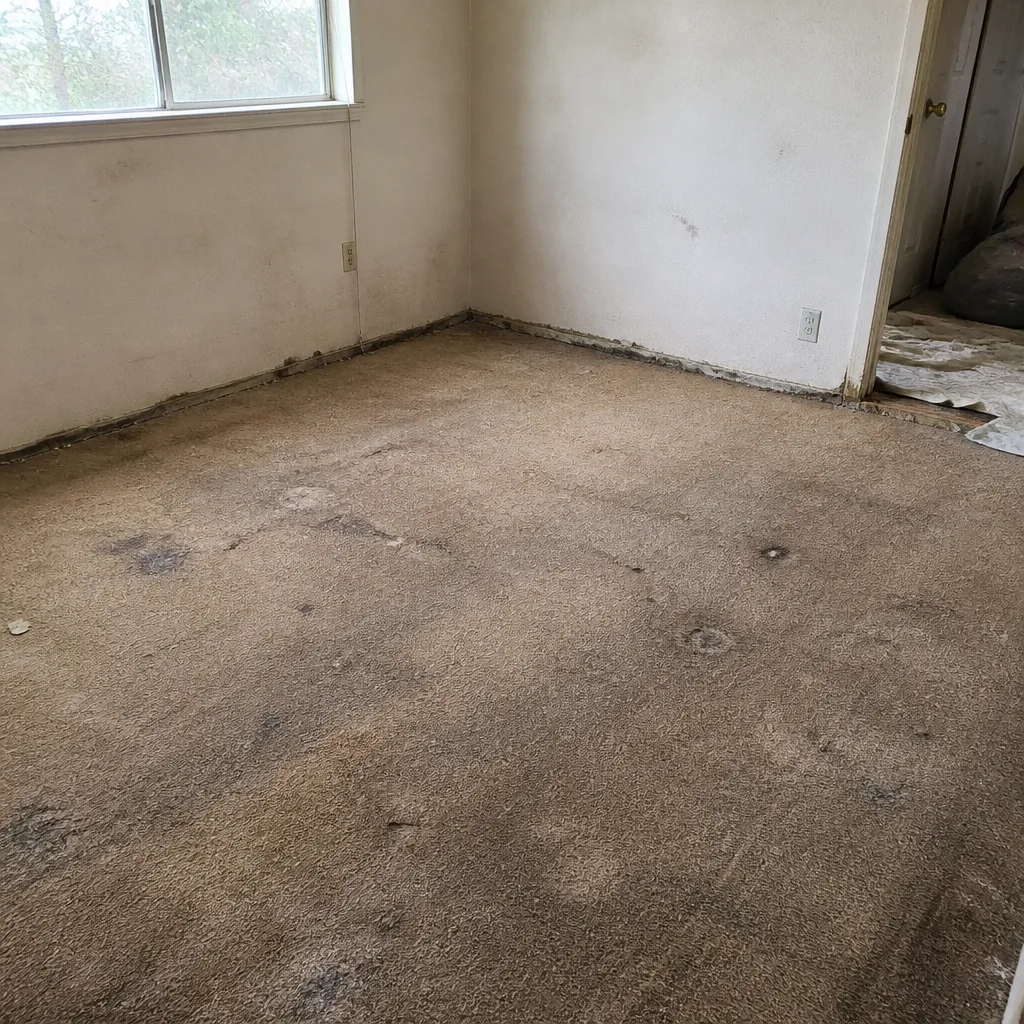 Before
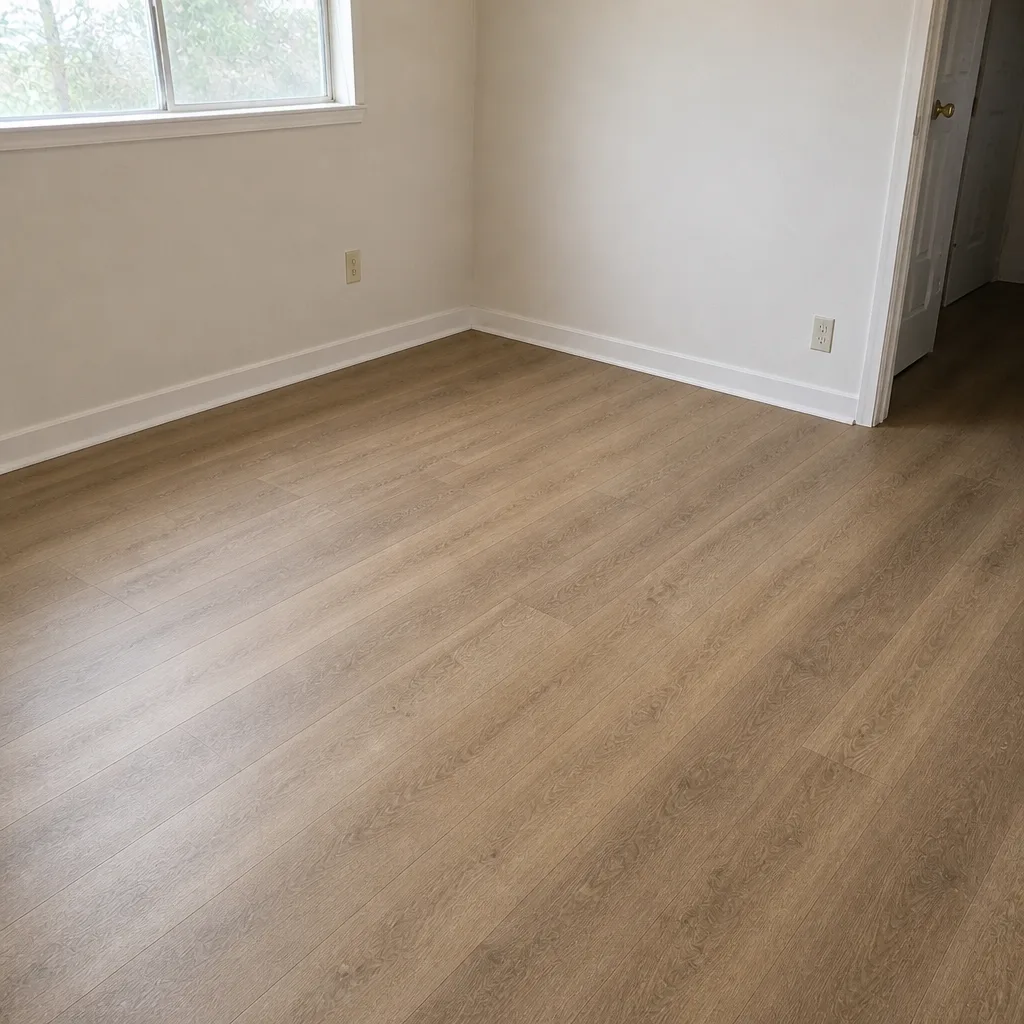 After
Common Mistakes to Avoid
- Installing over an unchecked slab. Skipping the moisture and flatness checks is the fastest way to void a warranty. If the slab isn’t verified, the floor’s performance is a gamble.
- Skipping self-leveling to save a line item. A budget quote that leaves out leveling often looks cheaper because the prep was never planned. Ask how the quote handles an uneven slab.
- Underestimating tile removal time. Old tile in a North Las Vegas resale often hides adhesive residue and old mud beds. The removal itself takes real labor and reveals conditions a quick glance won’t.
- Assuming the desert means dry. Slabs off-gas moisture whether you live in a wet climate or not. The rule is to test, not to assume.
- Choosing a moisture barrier by habit instead of by test. Some products need one, some come with their own, and some don’t. The moisture reading decides, not a generic recommendation.
- Booking the install day before the prep is planned. Prep often adds a day or two, and the timeline is set at the estimate. If a quote has no prep time, ask why.
- Comparing quotes without comparing prep scope. Two quotes for the same square footage can differ by thousands of dollars simply because one includes prep and one doesn’t. Ask what each one covers under the floor.
When to Call a Professional
Not every flooring project needs a specialist, but certain subfloor conditions do. If the slab has visible cracks, high or low spots you can feel, or a hollow sound when you tap it, get a professional assessment before you buy flooring. If you’ve pulled back a floor and found old adhesive, uneven height between rooms, or a surface that crumbles, that’s a prepped-job sign. The same goes for moisture in a room near an exterior wall, a slab that was poured decades ago, or a home where the last floor popped or clicked. These are the conditions where a trusted installer’s prep plan makes the difference. Floors North Las Vegas offers free estimates in North Las Vegas. Call (888) 393-9180 to schedule one. We answer 24/7, with fast dispatch from 7am to 7pm, Sunday through Friday.
Frequently Asked Questions
A subfloor is the surface layer that sits directly under your finished flooring, carrying the floor above. In most North Las Vegas homes, that’s a concrete slab rather than a wood-framed base. It has to be flat and dry, and it’s what the finished floor attaches or rests on. If the subfloor is uneven or active with moisture, the floor on top of it can fail.
Yes, a concrete slab on grade can release moisture even in a dry climate. The slab sits in contact with the ground, and moisture migrates through it slowly over time. That vapor can affect adhesive and floating floors. It’s why a moisture test is part of any good install plan in North Las Vegas, regardless of the season.
Manufacturers typically require the slab to be flat within a stated tolerance, often around 3/16 inch over 10 feet. The exact number depends on the flooring product. A straightedge check identifies whether your slab is close enough. If it isn’t, self-leveling compound or grinding brings it into spec before installation.
No. The requirement depends on the product and on what the moisture test shows. Some flooring systems need a separate barrier, some have one built into the underlayment, and some don’t require one at all. The safe approach is to test the slab first, then follow the product’s instructions and the written estimate.
Sometimes, but it depends on the tile’s condition, the resulting floor height, and the product. Often the safer route is to remove the tile so the slab can be inspected and prepped properly. Old tile can hide adhesive residue, cracks, and height changes between rooms. A professional assessment at the estimate visit is the right starting point.
Prep often adds time before the install day, and the exact amount depends on the home and the product. A poured leveling compound needs to cure before flooring goes down, and tile removal takes real labor. The schedule is set at the estimate, and the install day is booked after prep is planned. Call (888) 393-9180 for an exact estimate. The estimate is free.
The Bottom Line
The flooring you see is only half the project. The subfloor underneath decides how the finished floor performs, and in North Las Vegas that usually means a concrete slab that has to be checked for flatness and moisture before anything is installed. Self-leveling compound, old tile removal, and the right moisture barrier are all part of the prep, and they’re the difference between a floor that looks good on install day and one that still looks good years later. Prep is where a specialist earns their keep, and it’s the part worth asking about before you price a floor.
If you’re planning a flooring project in North Las Vegas, call us at (888) 393-9180 for a free estimate. We answer 24/7, with fast dispatch from 7am to 7pm, Sunday through Friday. Our technicians have up to 11 years of experience, and we’ll walk the subfloor with you before a single plank is ordered. From nine brands under one specialist to restore-before-you-replace refinishing, we’ve built the whole service around the floor and everything that holds it up. Call (888) 393-9180 to schedule your free estimate.
Written by the team at Floors North Las Vegas.